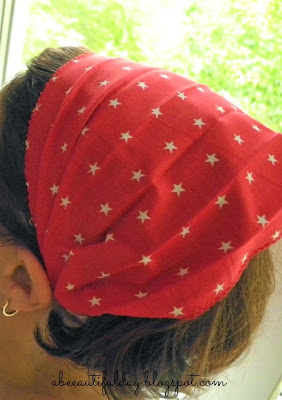
Usually, I buy them but yesterday I decided to try to make one. It was the end of the day and I didn't have the patience to start a new long-term project.
I took two pieces of fabric and one piece of elastic and within less than one hour I had a new headband/bandana.

For the main piece of fabric (the red one in the photo above) you may consider the length that covers your head from behind one ear to another. Mine is 15".
The elastic length = Head Circumference - Bandana length. Mine is 6".
Add to these lengths 1/2" seam allowances.
So, for 21" head circumference we need:
- one piece of fabric measuring 16" x 7" for the headband/bandana;
- one piece of fabric measuring 12" x 2 3/4" for the elastic's tube;
- one piece of elastic measuring 7" x 1".
We need also a safety pin or a loop turner.
Instructions:
Overcast the raw edges of the two fabric pieces.
1. The Elastic's Tube
Fold the piece of fabric lengthwise wrong side out. Sew the long edges together with a 1/4" seam allowance. Backstitch at the beginning and end of the seam.
 |
| The Elastic Tube |
 |
| Press so that seam line is positioned at the center. |
3. Insert the elastic into the tube using a safety pin.
 |
| The tube's seam line should have the same centered position when we insert the elastic. |
Pin the tube ends with the elastic to keep them in place.
Sew the tube and elastic ends together with 1/2" seam allowances. Backstitch at the beginning and end of the seam.
Set the tube aside.
 |
| This will be the center back of the tube. |
4. Take the piece of fabric for the headband/bandana.
Place it right side down.
On the short sides trace marks at every inch.
 |
| The tube's centered stitch line should be up. |
6. Fold the two exterior sides of the folded headband over the tube. Pin them in place.
Sew them together with 1/2" seam allowance. Backstitch at the starting and ending points.
7. Turn the headband right side out.
8. Repeat the step 6 with the other end of the tube and headband.
9. Turn the headband/bandana right side out.

 |
| Ready to be worn folded as a headband... |
 |
| ...and unfolded as bandana |
TIP
If you don't like to see the overcast edges, you may hem them. In this case, you need to know from the beginning how wide will be, in order to adjust the measures of the fabric piece.
If you don't like to see the overcast edges, you may hem them. In this case, you need to know from the beginning how wide will be, in order to adjust the measures of the fabric piece.
Have a beautiful day!
I am linking to Finish it up Friday.


What a wonderful useful piece. Thanks for sharing!
ReplyDeleteThank you for sharing, i love it
ReplyDelete