Showing posts with label binding. Show all posts

Tuesday, 30 January 2024

How to finish the quilt - The facing method

The face binding method hides the quilt's raw edges while freeing the quilt design from the visual binding's frame. It is very useful for the wall hanging quilts, but it can be used for any type of modern quilt. It also reduces bulk in the corners, and provides nice clean turned edges.There are several ways of doing it. I will show you how I did it.

abeeautifulday.blogspot.com-How to finish the quilt-The facing method


Facing the quilt with hanging corners

I used the same tools I use for binding.
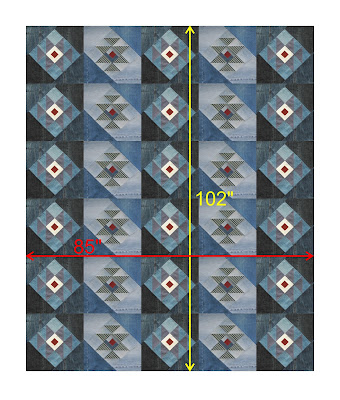
1. I trimmed the quilt. I measured the length and the width of the quilt (approx. 85" x 102)
abeeautifulday.blogspot.com-How to finish the quilt-The facing method
2. For each of the four quilt edges I prepared four strips of fabric 2 ½" wide and 3" shorter than each side of the quilt. In my case – (2) 2 ½" x 82" and (2) 2 ½" x 99" (you might keep the strip uncut and trim it when sewing, right before you get to the quilt corner). For each corner of the quilt I cut four 5" squares. 
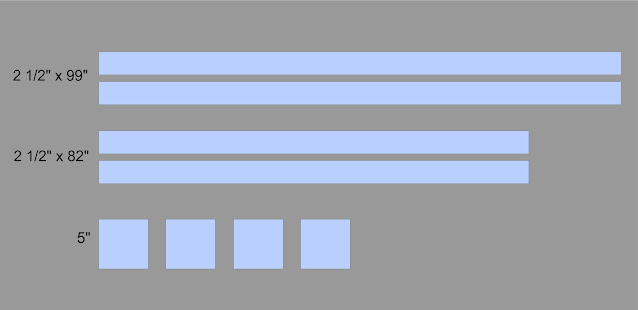
abeeautifulday.blogspot.com-How to finish the quilt-The facing method


3. I folded in half lengthwise right side out the four strips and pressed them with iron. I folded each square diagonally in half right side out to make triangles and pressed them. 

abeeautifulday.blogspot.com-How to finish the quilt-The facing method


4. I placed the quilt on a flat surface (floor) with the top facing up. I pinned the four triangles in each corner of the quilt with the raw edges of the triangles aligned with the raw edges of the quilt. I stitched the corners in place with ¼ " seam allowance.
 
abeeautifulday.blogspot.com-How to finish the quilt-The facing method


5. I centered and pinned the four folded strips along each corresponding side of the quilt, on top of the triangles, with the raw edges aligned with the raw edges of the quilt, leaving a 1 ½" gap at each corner of the quilt. 
abeeautifulday.blogspot.com-How to finish the quilt-The facing method


6. I stitched all the way around the edge of the quilt with a ¼' seam allowance, overlapping the corner seam lines. 

abeeautifulday.blogspot.com-How to finish the quilt-The facing method


If  you use a continuous strip, trim it right before you get to the quilt corner

abeeautifulday.blogspot.com-How to finish the quilt-The facing method


I clipped the four corners avoiding the seams.

abeeautifulday.blogspot.com-How to finish the quilt-The facing method


7.  I flipped the triangles to the back and, with a pen with the cap on, I carefully pushed all the corners out to give them a nice finish. I pressed the triangles in place. I pressed the strips away from the quilt. Then I folded, pressed them with steam to the back side of the quilt, having about 1/16″ of quilt front showing on the back.

abeeautifulday.blogspot.com-How to finish the quilt-The facing method


abeeautifulday.blogspot.com-How to finish the quilt-The facing method


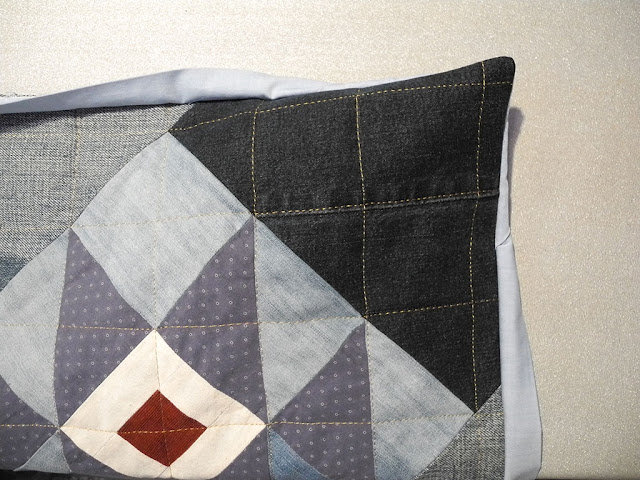
9. Keeping the quilt with the top up, I stitched by machine all the way around at 7/8 of an inch away of the quilt edges (the facing strips are 1" wide) to secure the strips to the back of the quilt. If you want that the stitching to be invisible on the quilt top, stitch the strips to the back of the quilt by hand.

abeeautifulday.blogspot.com-How to finish the quilt-The facing method

abeeautifulday.blogspot.com-How to finish the quilt-The facing method


abeeautifulday.blogspot.com-Meeting with friends quilt pattern


abeeautifulday.blogspot.com-How to finish the quilt-The facing method


I hope you find this post helpful. 
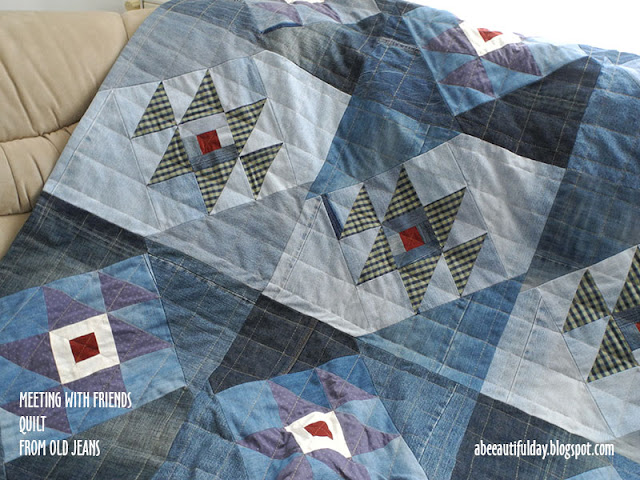
I used this method to finish a quilt made from old jeans and men's shirts, following the instructions of "Meeting with friends" quilt pattern.

abeeautifulday.blogspot.com-Meeting with friends quilt pattern


Have a beautiful sewing day, my dears!

Sunday, 21 August 2016

How to finish the quilt - The Self binding method

I decided to try different methods for finishing the quilts. 
Until now, the only way I did this was sewing a folded in half strip of fabric around the outside of the quilt.
This time, I used the one known as the self-binding method.

Tutorial-How to finish the quilt - The Self binding method-abeeautifulday.blogspot.com

Here are the steps I followed finishing my recent Forever Together quilt:

The quilt had the backing and batting wider than the top.

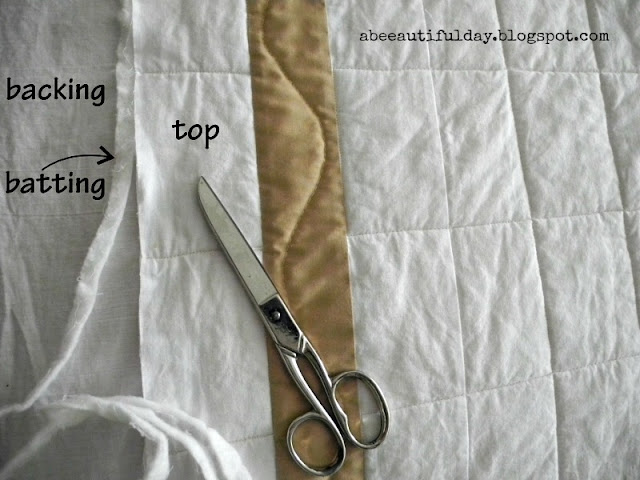
1. After I quilted it so that not overcome the edges of the quilt top,  I laid the quilt on the working table. Using the scissors, I trimmed first, the batting right to the edge of the top.

Tutorial-How to finish the quilt - The Self binding method-abeeautifulday.blogspot.com


2. Then I trimmed the backing, 1" wider than the quilt top all around.

Tutorial-How to finish the quilt - The Self binding method-abeeautifulday.blogspot.com

Tutorial-How to finish the quilt - The Self binding method-abeeautifulday.blogspot.com


3. On one side of the quilt, I began folding the edge of the backing in half so that the raw edge lines up with the edge of the quilt top.

Tutorial-How to finish the quilt - The Self binding method-abeeautifulday.blogspot.com


4. I folded it again so that overlapping the quilt top by ½ " and pinned in place.

Tutorial-How to finish the quilt - The Self binding method-abeeautifulday.blogspot.com


5. At the corner, I folded the backing edge like in the photo below.

Tutorial-How to finish the quilt - The Self binding method-abeeautifulday.blogspot.com


6. I continued on the next backing side, by folding it first in half ...

Tutorial-How to finish the quilt - The Self binding method-abeeautifulday.blogspot.com

...and then folding it again in half, overlapping the quilt top by ½ " so that obtaining a neat mitered corner. I pinned it in place and I continued all the way around the quilt until I had the whole backing folded and pinned. 

Tutorial-How to finish the quilt - The Self binding method-abeeautifulday.blogspot.com


7. I stitched close to the edge. 

Tutorial-How to finish the quilt - The Self binding method-abeeautifulday.blogspot.com


And that was all.

Tutorial-How to finish the quilt - The Self binding method-abeeautifulday.blogspot.com


Conclusions:

This method is good when: 
- you are sure that the quilt edges are straight because you can't square it up;  
- the backing fabric looks good next to the quilt top fabric, as it will be used for binding too; 
- you don't mind that the quilting stitches might be visible over the binding, on the back side of the quilt. In this regard, when quilting, backstitch when reaching the quilt top edges.

It is a quick and easy method to bind a quilt. You don't have to take out the quilt of the sewing machine, you don't have to join the ends of the binding.

I will use it again, for sure.


Have a beautiful sewing week, my dears!