Friday, 29 December 2017

Good bye, 2017!

It ends another year. A not so pleasant year for me. The quilting and sewing journey was full of obstacles and the personal life was complicated by all sort of situations. Things have improved only in the last days of 2017, on time to cheer us up for looking with a little hope for 2018.

That being said, I want to bring into this post an optimistic note.
This is one of my new patchwork designs. I started thinking about it this autumn and I'm still working on it, trying to find its best layout and use. I will tell you more about this block in one of my future posts.

New patchwork block - abeeautifulday.blogspot.com

For now, here is one of the bags for which I used this variant.

New patchwork block - abeeautifulday.blogspot.com


And here is a printable including it - the 2018 one page Calendar - a present for you, my faithful readers.

2018 one page Calendar free printable - abeeautifulday.blogspot.com

Right - click on the photo above, choose Save Image As and save it in your computer.
It will work both as printable and desktop wallpaper. 
If printing (on cardboard or plain paper) I suggest using the " Scale to paper size" feature.

Have a beautiful, happy, healthy and prosperous 2018, my dears!

Thank you for your support!


Tuesday, 3 October 2017

Single Piece Rectangular Pillow Cover - Tutorial

Making assorted pillow covers for our bedding is one of the least costly ways to freshen up the bedroom.
In this tutorial, I will show you an easy method to make an envelope cover for a rectangular pillow in just minutes. Really.
You need only one piece of fabric and a bit of sewing thread. 

Take a look below!

Tutorial-Single Piece Rectangular Pillow Cover-abeeautifulday.blogspot.com

Pillow insert size - 18" x 23" (46 cm x 58.5 cm)
Pillow cover size - 18" x 23" (46 cm x 58.5 cm)
My personal choice - For the decorative pillows I prefer to make the cover 1" smaller than the insert, but for the bedding, I make the cover the same size with the insert.


MATERIALS needed
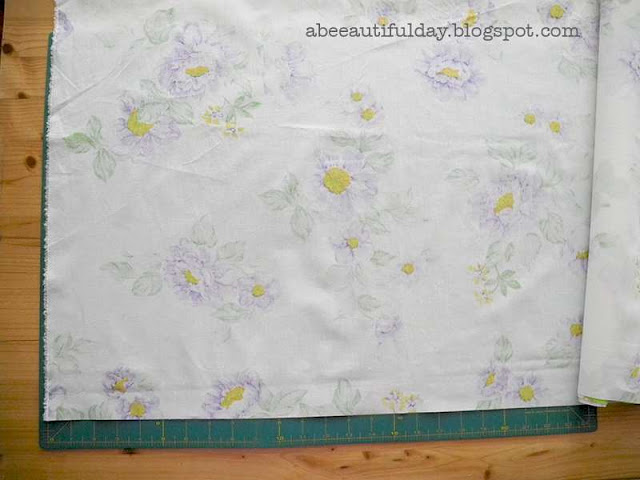
  • Fabric - 18 ½ " x 56" (47 cm x 142.5 cm)

As a rule of thumb
For a rectangular pillow cut one piece of fabric that is the height of the pillow insert + ½ " (1.5 cm) and 2 x length of the pillow insert + 10" (25 cm).

Tutorial-Single Piece Rectangular Pillow Cover-abeeautifulday.blogspot.com

  • Matching thread
  • Scissors or fabric cutter
  • Pen/pencil for marking (optional)
  • Ruler 
  • Pins    

If desired wash and iron your fabric before starting to cut.

INSTRUCTIONS

Step 1

Lay the fabric wrong side up. 

Tutorial-Single Piece Rectangular Pillow Cover-abeeautifulday.blogspot.com

Fold one of the short edges under ½ " (1,5 cm)  and press. 

Tutorial-Single Piece Rectangular Pillow Cover-abeeautifulday.blogspot.com

Fold it under again, press and pin in place. 

Tutorial-Single Piece Rectangular Pillow Cover-abeeautifulday.blogspot.com

Sew the hem down about a 1/8" (0.3-0.4 cm) from the inside edge. 
Backstitch at the beginning and end of the stitches.
Repeat with the other short edge.

Tutorial-Single Piece Rectangular Pillow Cover-abeeautifulday.blogspot.com


Step 2

Lay the fabric flat right side up horizontally.

Tutorial-Single Piece Rectangular Pillow Cover-abeeautifulday.blogspot.com

Fold the fabric wrong side up by placing the right short edge at 8" from the left edge. See the photo below.

Tutorial-Single Piece Rectangular Pillow Cover-abeeautifulday.blogspot.com

Fold the left edge overlapping the right edge by 8". Keep the long edges aligned. See the photo below.

Tutorial-Single Piece Rectangular Pillow Cover-abeeautifulday.blogspot.com

Pin in place and sew along the two long sides with 1/4 "seam allowance. Backstitch at the beginning and end of the stitches. 

Tutorial-Single Piece Rectangular Pillow Cover-abeeautifulday.blogspot.com

Secure the edges with a zig-zag stitch. 

Tutorial-Single Piece Rectangular Pillow Cover-abeeautifulday.blogspot.com


Step 3

Turn the pillow cover right side out and push the corners out. Press. 

Tutorial-Single Piece Rectangular Pillow Cover-abeeautifulday.blogspot.com
          
Tutorial-Single Piece Rectangular Pillow Cover-abeeautifulday.blogspot.com

Fill the cover with the pillow.

Tutorial-Single Piece Rectangular Pillow Cover-abeeautifulday.blogspot.com

Tutorial-Single Piece Rectangular Pillow Cover-abeeautifulday.blogspot.com

Tutorial-Single Piece Rectangular Pillow Cover-abeeautifulday.blogspot.com


Sew further the next ones!

Have a beautiful day, my dears!

I am linking to Finish it up Friday!


Tuesday, 15 August 2017

Applique letters with fusible web --- "draw on the fabric" method


Letters applique is one of the easiest methods to create something from almost nothing in no time.
Placing a monogram, a meaningful word or a name on a pouch, pillow cover, or quilt is a creative and fast way to transform a common object into a special one. 


Usually, when using fusible web the main applique steps are these:

1. Print out the letters of the size that you like.
2. Reverse the printed sheets with letters and tape them on a window or light screen. You need to reverse the letter so it reads the correct way on the finished item.
3. Place over the printed letters the fusible web with the paper side up and draw around the needed letters.
4. Cut the letter shape out from the fusible web leaving a small margin around the edge.
5. Take the fabric you want to cut the letters from and place it with the wrong side up on the ironing board. Carefully place the fusible web letters on top of the fabric. Press according to manufacturer's instructions. 
6. Leave the fabric with the fused letters to cool for a couple of minutes.
7. Cut precisely on the pencil lines that you drew.
8. Remove the paper backing from all the letters.
9. Place the fabric letters onto the background fabric, coated side down.
10. When you're happy with the placement of the letters, iron them in place. 
11. Sew the letters in place. You could use different types of stitches for this: straight, blanket stitch, zigzag, satin stitch.

BUT

If your first 3 steps are these:

1. Print out the letters of the size that you like.

2. Tape the printed sheets in NORMAL position (not reversed) on a window or light screen.


3. Place over the printed letters the piece of FABRIC with the RIGHT SIDE UP and draw around the needed letters.


Next, you could proceed as follows:

4. Take the piece of fabric with the drawn letters (in normal position) on its right side and place it with the WRONG SIDE up on the ironing board. Cut a piece of the fusible web according to the fabric piece dimension.
Carefully place the fusible web piece on top of the fabric. Press according to manufacturer's instructions. 
5. Leave the fused fabric to cool for a couple of minutes.
6. Gently cut inside the pencil edges of the letters. This way, you will get rid of the pencil traces. 

the wrong side of the fabric letters with the paper backing of the fusible web still attached

If you still have some visible lines, do not worry. The stitch for securing the edges will cover them.


Next, you will follow the steps of the usual method:

7. Remove the paper backing from all the letters.


8. Place the fabric letters onto the background fabric, coated side down and iron them in place.


9. Sew the letters in place.


 When choosing the letters for applique I would recommend a quite simple shape as this will be easier to both cut and sew.

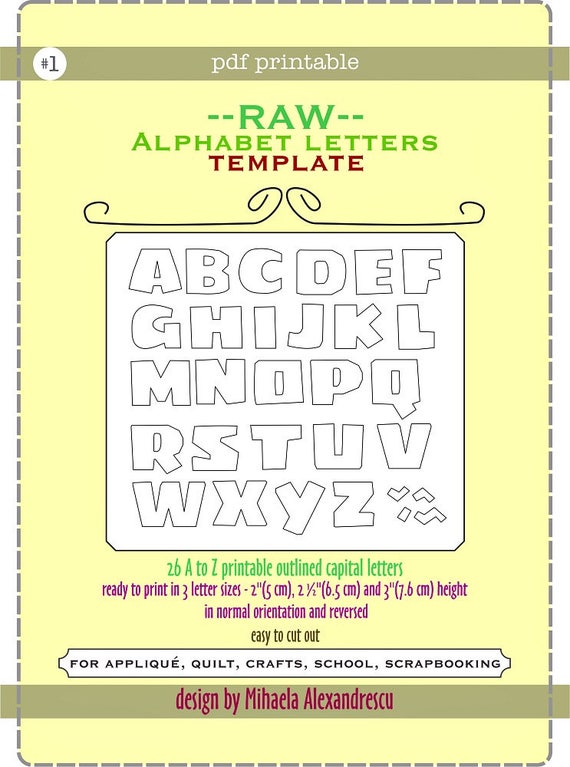
If you are thinking about having some fun adding words to your projects, you might consider the Printable set of letters I drew.

The pdf file contains 26 printable capital letters in normal orientation and reversed, grouped in  3 sets according to the height of the letters  (measured from top to bottom):
- 2"(5 cm), 2 ½"(6.5 cm) and 3"(7.6 cm) height.


For this pouch I printed the set of letters of 2" (5 cm) height, shrinking to 60% to get letters of about 1 " (3 cm) height.

Enjoy your sewing hours!

Have a beautiful day, my dears!


Thursday, 13 July 2017

Spell your name - Drawstring bags with appliqued letters for kids

It's full Summer but around me, people who have kids have started preparing them to go back to kindergarten. Slowly but surely.

One of my friends asked me to make her two drawstring bags for her nephew who will go for the first time to the kindergarten. The only expressed wishes were to write his name: Toma, and the bag's dimension: 13" x 17" (33 cm x 43 cm).

Because the name was short, it gave me the opportunity to create a little visual story with more chances to be loved by the little boy. Instead of just laying down the letters over the bag background I created the designs of two toys (that are near the boys hearts from generations): a van and a truck and made them carrying the name.
I have made a few layouts offering to my friend different color combinations to choose from.
These are her choices.

 My Pickup Truck - unlined drawstring bag


My Truck - lined drawstring bag 


with two big interior pockets


and one exterior zippered pocket


I like so much this striped zipper that I stitched it on top of the pocket opening. It integrates so well into the design of the bag!

The cars and letters are raw edge applique. For securing the edges I used zig zag stitch and blanket stitch.


I thought the shapes of the two cars so that their pieces to be easy to cut and assemble.

And the same way I thought the design of the letters.
I tried to give it a simple and playful layout because I needed an alphabet set I can use in as many projects as possible, not only in this particular one.


I think that the pillows, quilts, home decorations, pouches, bags, T-shirts, gift wraps, even wall art, including names, monograms, words and popular phrases, have a special, personal, modern look that stands out in the most pleasant way.

If you plan some projects needing some capital letters, maybe the template I used for this drawstring bags will help you too.


The Alphabet Capital Letters Template is here.
For these drawstring bags, I used the 2" reversed templates of the letters.

Enjoy your work!

Have a beautiful day, my dears!
I'm linking to Finish it up Friday!
                       Finished or Not Friday


Monday, 3 July 2017

I Love My Doll applique pillow cover quilt pattern is ready!


I just launched the pattern of a cute little quilt:
I love my doll!


Its dimensions -  16" x 16 " -  are ideal for a pillow case or a wall hanging for a lovely little girl.  
The pattern includes instructions for a pillow case.
The main technique is the raw edge applique - simple and fast. One border added to the doll block and the quilt top is ready. Oh, I forgot to tell you that the doll name is Emma.
I told you something about her and her sister a while ago when I introduced them to you.


The pattern provides:
- instructions for preparing the applique pieces
- instructions for piecing the quilt top
- instructions for preparing one color and two color prairie points
- suggestions for securing the applique edges and quilting
- instructions for finishing the quilt 
- instructions for assembling the pillow cover
- layout suggestions
- ready to print templates

There are 40 illustrations and diagrams gathered in 16 pages.
The measurements are in inches.

You need:
Fabrics 
- one fat quarter or 18" x 18" piece of fabric for border; 
- one fat quarter or 18" x 18" piece of fabric for backing
- one fat quarter or 16" x 22" piece of fabric for the pillow back
- a few pieces of fabric for the appliqued doll 
- 2 ½ " x 80" for binding
Batting 
- 18 " x 18" 
Fusible web - about 8 " x 18" or temporary adhesive spray or fabric glue that maintains its qualities after pressing.
Water soluble pen, red and black permanent markers
Scissors, coordinated thread
Open – toe foot for securing the applique edges


In addition to this pattern, I'm working on the templates of a few friends of Emma. Girls and boys. You will have the possibility to add one by one a collection of applique dolls for your kid's room or to choose the ones they like most.
Emma's friends will be available as templates only. You will use the instructions of Emma pattern, launched today, I love my doll!
Emma's friends individual templates will be listed in my Etsy pattern shop, as I will finish them.

I love my doll pattern is here.
I hope you will enjoy it!

Have a beautiful day, my dears!

Linking to Finish it up Friday!


Friday, 30 June 2017

Summer Backpack, Summer Bag

In this part of the world, we have a hot Summer.
I managed to reorganize my summer clothes and shoes, but I realized once again that I don't have a summer backpack assorted with such a lightweight outfit yet. 
From some time, my spine likes backpacks more than bags.
As I had in my stash a few yards of fabric I bought a long time ago having in mind backpacks, bags and pouches, three days ago I started to make it.
I didn't have a pattern, I just knew how I want it to look.

It took me two days to finish it but only because I had no idea how to do it. Everything was set up on the go.


That's why the two exterior pockets I placed on each side came out too small. But they are still large enough for the cell phone and keys.


The interior is roomy and handy as it has two large pockets. Of course, I looove pockets! 
I think you never have enough pockets!


The next one will be perfect, I'm sure.

But for now, I have to make a bag for one of my friends. 
I will use my Bluebell bag pattern because my friend told me that it has one key feature she loves most: the exterior zippered pocket placed on one side. 


At the first glance, this pocket looks like a usual one. In fact, it is a tricky pocket.
Thru the little opening, you access actually the both interior sides of the bag. No, you don't get in the bag. It is a huge pocket embracing the whole bag.
This means enough room both to keep the things you need to have on hand and to create a secret place hiding your precious things. Reading these, it seems to be contradictory. In fact, I thought this space to have just this functionality. It really works. 

So, I'm going back to work.

  
Have a beautiful day, my dears!

I am linking to Finish it up Friday!


Monday, 15 May 2017

Retro Car applique in a few steps

I dream about a quilt with retro cars for a while. Maybe a bed quilt, maybe a wall quilt. I have not yet decided which one to make.

I love also appliqué.
I started a few projects having raw edge appliqué as main quilting technique in order to practice the ways of securing the edges of the appliqued pieces.
Today I share one of them combined with a little thread painting.

Retro Car applique in a few steps

I drew an old BMW because is my favorite car brand.
In order to give it some texture and 3D look, I outlined the possible shining and shadowed areas of the car in a few little areas of color shades.
I made a template and printed it.

I transferred the design onto the background fabric.
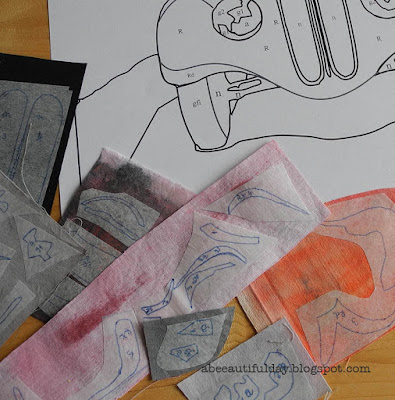
I traced the design of the pieces onto the paper side of the fusible web and fused them on the wrong side of the fabric pieces.

Retro Car applique in a few steps


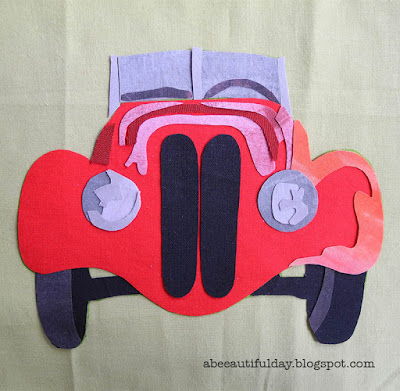
After cutting them out and peeling-off the fusible web, I put each piece in place.

Retro Car applique in a few steps

Retro Car applique in a few steps

Retro Car applique in a few steps

Retro Car applique in a few steps

Retro Car applique in a few steps


I checked that all the pieces are in place and I carefully pressed them.

Normally, next I would have added the batting and backing to make the quilt but this time I wanted to see how it will look using tear-away stabilizer.

Retro Car applique in a few steps

I sat at the sewing machine assuming the needle was a pencil in my hand. I intended to cover two tasks: outlining the car shape and fading the edges of the fabric pieces to make them shade imperceptibly into each other acting like illuminated and shaded areas.


The result was this. For a first time, I think it looks pretty good.

Retro Car applique in a few steps


Next time I will add batting to make a quilt. I will think also if there are some areas or edges to secure before quilting.
We will see.


If you are in a mood for a quick and nice applique project, maybe you would like to try this one.

Until next time,
Have a beautiful day, my dears!

Linking to Finish it up Friday!