Showing posts with label doll. Show all posts

Monday, 3 July 2017

I Love My Doll applique pillow cover quilt pattern is ready!


I just launched the pattern of a cute little quilt:
I love my doll!


Its dimensions -  16" x 16 " -  are ideal for a pillow case or a wall hanging for a lovely little girl.  
The pattern includes instructions for a pillow case.
The main technique is the raw edge applique - simple and fast. One border added to the doll block and the quilt top is ready. Oh, I forgot to tell you that the doll name is Emma.
I told you something about her and her sister a while ago when I introduced them to you.


The pattern provides:
- instructions for preparing the applique pieces
- instructions for piecing the quilt top
- instructions for preparing one color and two color prairie points
- suggestions for securing the applique edges and quilting
- instructions for finishing the quilt 
- instructions for assembling the pillow cover
- layout suggestions
- ready to print templates

There are 40 illustrations and diagrams gathered in 16 pages.
The measurements are in inches.

You need:
Fabrics 
- one fat quarter or 18" x 18" piece of fabric for border; 
- one fat quarter or 18" x 18" piece of fabric for backing
- one fat quarter or 16" x 22" piece of fabric for the pillow back
- a few pieces of fabric for the appliqued doll 
- 2 ½ " x 80" for binding
Batting 
- 18 " x 18" 
Fusible web - about 8 " x 18" or temporary adhesive spray or fabric glue that maintains its qualities after pressing.
Water soluble pen, red and black permanent markers
Scissors, coordinated thread
Open – toe foot for securing the applique edges


In addition to this pattern, I'm working on the templates of a few friends of Emma. Girls and boys. You will have the possibility to add one by one a collection of applique dolls for your kid's room or to choose the ones they like most.
Emma's friends will be available as templates only. You will use the instructions of Emma pattern, launched today, I love my doll!
Emma's friends individual templates will be listed in my Etsy pattern shop, as I will finish them.

I love my doll pattern is here.
I hope you will enjoy it!

Have a beautiful day, my dears!

Linking to Finish it up Friday!


Saturday, 8 April 2017

A sneak peek into my work room

I'm sure that I'm not the only one feeling energized by the fresh signs of Spring.
Every day the tree branches become greener and the sun enriches the color palette of the gardens encouraging more and more flowers to bloom.
In the morning I open the window and I can't wait to feel the cool air coming into the room. This gives me an unexpected strength and inspiration to work quick and happy and to sew more and more of the projects from my long to-do list.


So, I just finished another pillow cover quilt for a new pattern.
I made the design last year and let it wait until now.
It might seem a complicated layout but in fact, it is not. In the pattern, I do my best to explain all the leading steps to complete the quilt without fails.


Until it will be finished, If you need some inspiration for your future sewing projects, maybe you will find something here.

So that is all for today.
Back to work, now.

Have a beautiful weekend, my dears!


I am linking to Finish it up Friday!

Friday, 22 April 2016

My dear doll - two pillows for two little girls

I finished the mix-of-techniques project started about ten days ago.

I  have drawn the two dolls having in mind that they will become appliques: with simple shapes, minimum details and above all, not too small pieces.

At the same time, I was thinking about what kind of stitches I will use for securing the edges in an esthetic and functional way - they will be on usable objects and will be washed many times.


But then another problem came up: to use one color of thread or many? As you may see, I chose many. I kept the same thread in the bobbin (a simple thread I used for piecing), so I changed only the upper thread and the whole thing was not so time consuming. Yes, it is not the first time I broke the "use-the-same-quality/color-thread-on-both-places-of-your-sewing-machine" rule. Usually my sewing machine approves this.
I stitched first all requiring the same color of thread and then I moved to those needing another color, and so on.
Besides doll faces elements and names, I did all the other stitches having the quilt top on the batting and backing, as I wanted the dolls components to detach from the background.
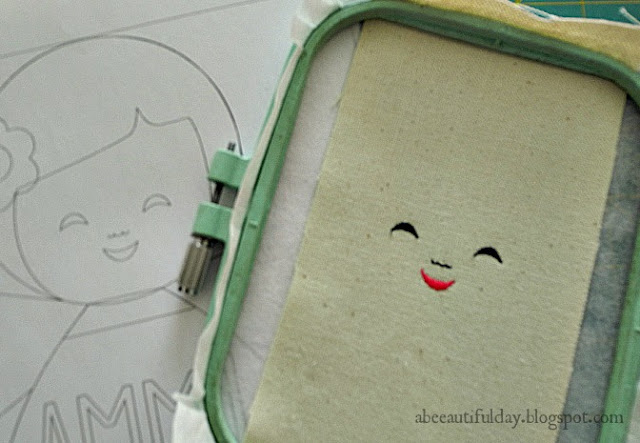
For the faces and names I digitized the drawings and gave the stitching job to my embroidery machine. But I'm sure they give no problem even for a beginner in hand embroidery.


The patchwork part shows its simplest layouts: the green frames added to the central dolls panels and a few pieced patches for the two colors-prairie points.
The quilting includes the stitches of the appliqued dolls and the straight lines stitched throughout the frame. I used both the free motion foot (for the hair, hearts and background) and the walking foot.

While writing these things I realized that it is more complicated to describe in words than do "My dear doll" mix-of-techniques-project.


I keep working on this pattern.
Maybe someday somebody loving both embroidery and quilts will like to have it and make it.

Have a beautiful day, my dears!

I'm linking to Finish it up Friday!


Sunday, 10 April 2016

My dear doll --- a mix-of-techniques project

I started to make two pillows for two little sisters. Using machine embroidery, applique, patchwork and quilting in a single project might be a challenging work but I hope to pass smoothly through all of them.
Just a sneak peek for now:


I loooove short names! Imagine how it would be to have to write Alexandra or  Isabella...

Have a beautiful week, my friends!

Monday, 28 April 2014

The Shy Ada - a tutorial and a newsletter


From time to time, when I'm tired and I can't work, I return to my drawn little girls and boys.
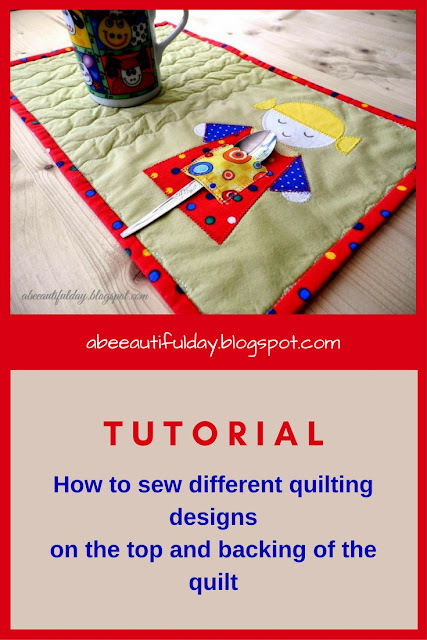
Thinking of a shy little girl to whom I intend to make a gift, I drew Ada.  I appliqued it on a piece of fabric and I placed on its dress a pocket in which it keeps the teaspoon on hand for the little girl.


Then I used this piece of fabric to make the mug rug from above. But I wanted to make quilting appearing different on the two sides:  top and backing. 
As you may see, on the left side of the top I left room for cup or plate so that Ada is not covered by them.
Different quilting designs on the top and backing of the quilt-tutorial-abeeautifulday.blogspot.com

First I quilted the backing with the batting together, with waving lines parallel with the long sides.

 Different quilting designs on the top and backing of the quilt-tutorial-abeeautifulday.blogspot.com


Then I added the top with the stitched appliqué...

Different quilting designs on the top and backing of the quilt-tutorial-abeeautifulday.blogspot.com


 ...and I cross quilted with the same waved lines all the three layers together but only on the empty left half. 

Different quilting designs on the top and backing of the quilt-tutorial-abeeautifulday.blogspot.com
On  Ada’s half,  I stitched only one row with waves, along the edge of the 3 external sides. In the end, It appears as a discreet scalloped border because the waving is partially covered by the binding. 
 And so, in this simple way, I managed to make my mug rug to have a quilting design on the top:
Different quilting designs on the top and backing of the quilt-tutorial-abeeautifulday.blogspot.com

 ...and another quilting design on the baking:
Different quilting designs on the top and backing of the quilt-tutorial-abeeautifulday.blogspot.com


The Shy Ada free design is my gift for all my newsletter subscribers.

I think Ada would look great also on a girl’s pillow. Or maybe on a quilt, why not? If you need a larger design, print it at a larger scale.

Have a beautiful day!
Linking up to Linky Tuesday
 

Friday, 25 October 2013

Two Little Angels / Doi ingerasi


Purity, Peace, Love - Little Sara Elena, the real angel and her scented guardian with the heart full of lavender.
 
Her mom was so kind to send me these photos.

The Baptismal Candle


Sweet dreams, dear Sara Elena!
May you get beautiful, healthy and happy!


Have a beautiful day, my dears!


Wednesday, 9 October 2013

A Little Angel / Un Ingeras

Pe masa mea de lucru a poposit un ingeras.

M-a ales pe mine sa-i dau chip si trup. Iar eu n-am putut decat sa spun: Bine, ma apuc de lucru!


A fost atat de dornic(a) sa ajunga la micuta pe care o va insoti, incat n-am avut nicio piedica in timpul lucrului: tot ce mi-am imaginat, am infaptuit: am desenat, taiat, cusut, fara pasi inapoi, fara incercari ratate, fara indoieli.
Va spun, a fost asa de cuminte, incat o sa-i duc dorul! 
Pentru poze n-am avut lumina buna si nici prea mult timp pentru prelucrarea lor, dar mi-a spus sa stau linistita, sa nu-mi fac probleme. NE vede foarte bine.

Panglica alba va ajuta la prima sa misiune: de straja la lumanarea de botez


Mai avem putin timp de petrecut impreuna.
Pregatirile de drum au inceput, asa ca va las si va urez

Sa aveti o zi frumoasa, dragii mei!

I am linking to Finish it up Friday
and Dulce Casa


Tuesday, 8 January 2013

New year, new dolls!


Am inceput anul lucrand papusi.
Sunt in probe.


De data asta sunt umplute cu lavanda - stiu ca stiti, dar nu ma pot abtine sa nu repet: de la mine din curte ;). Au rol de pernute parfumate si jucarie si pentru copiii mari (adica cei care merg la liceu, facultate, serviciu...sau stau acasa) si pentru copiii mici (adica cei care merg la gradi, scoala....sau stau acasa).
Bineinteles ca nu vor arata toate asa. Si bineinteles ca vor fi si baieti!
Nu vor fi toate parfumate cu lavanda. Vor purta parfumul ales de fiecare, si care va putea fi schimbat oricand. Sau nu vor fi parfumate deloc.


Ma intorc la lucru.

Sa aveti o zi frumoasa!
Sa aveti un an mai bun!

Wednesday, 21 November 2012

Another one! / Inca una!

My second doll is ready.
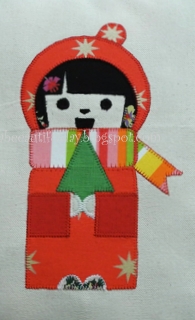
Ready for Winter Holidays.
Look how bright is the little Star!


Now, what do you think? This new doll is a She or a He?


I'm waiting for your opinion. Really!
I need some help to improve the design of my dolls.
I would appreciate your messages very much!


Thank you from now!
and
Have a beautiful day!

Sunday, 18 November 2012

My Doll / Papusa mea

Iat-o, in sfarsit!


Desi abia am trecut de jumatatea lui noiembrie, a insistat sa aiba costumatia de Sarbatori.
Repeta de zor Colinde!
Acum ma ocup de fratii si surorile ei.
Ca si ea, deocamdata, vor decora fie fete de perna, fie sacose, fie....alte lucruri utile.


Nu m-am decis inca ce nume va avea fiecare si nici ce nume va avea familia lor.
Aveti sugestii, in sensul asta? Mi-ar prinde bine o mana de ajutor! Sau mai bine-zis, o idee de ajutor....
Zilele astea vremea a fost asa de mohorata si lumina asa de slaba, incat cu greu am reusit sa fac niste poze cat de cat prezentabile.
Ceva-ceva insa, se distinge, nu-i asa?

 Ii place sa se ascunda printre celelalte fete de perna pe care le-am lucrat!

Astept cu nerabdare, impresiile voastre!

Have a beautiful week!