Showing posts with label fata de perna. Show all posts

Monday, 3 July 2017

I Love My Doll applique pillow cover quilt pattern is ready!


I just launched the pattern of a cute little quilt:
I love my doll!


Its dimensions -  16" x 16 " -  are ideal for a pillow case or a wall hanging for a lovely little girl.  
The pattern includes instructions for a pillow case.
The main technique is the raw edge applique - simple and fast. One border added to the doll block and the quilt top is ready. Oh, I forgot to tell you that the doll name is Emma.
I told you something about her and her sister a while ago when I introduced them to you.


The pattern provides:
- instructions for preparing the applique pieces
- instructions for piecing the quilt top
- instructions for preparing one color and two color prairie points
- suggestions for securing the applique edges and quilting
- instructions for finishing the quilt 
- instructions for assembling the pillow cover
- layout suggestions
- ready to print templates

There are 40 illustrations and diagrams gathered in 16 pages.
The measurements are in inches.

You need:
Fabrics 
- one fat quarter or 18" x 18" piece of fabric for border; 
- one fat quarter or 18" x 18" piece of fabric for backing
- one fat quarter or 16" x 22" piece of fabric for the pillow back
- a few pieces of fabric for the appliqued doll 
- 2 ½ " x 80" for binding
Batting 
- 18 " x 18" 
Fusible web - about 8 " x 18" or temporary adhesive spray or fabric glue that maintains its qualities after pressing.
Water soluble pen, red and black permanent markers
Scissors, coordinated thread
Open – toe foot for securing the applique edges


In addition to this pattern, I'm working on the templates of a few friends of Emma. Girls and boys. You will have the possibility to add one by one a collection of applique dolls for your kid's room or to choose the ones they like most.
Emma's friends will be available as templates only. You will use the instructions of Emma pattern, launched today, I love my doll!
Emma's friends individual templates will be listed in my Etsy pattern shop, as I will finish them.

I love my doll pattern is here.
I hope you will enjoy it!

Have a beautiful day, my dears!

Linking to Finish it up Friday!


Friday, 27 February 2015

New Kid in town

Here is the guy from my previous post.

Another collaboration with Romanian artist Lenus Dragulelei
He says: 
Good bye Winter! Welcome Spring! 

A cheerful pillow perfect for lifting the spirit, isn't it? 


Have a beautiful Spring, my dears!

Saturday, 7 February 2015

In between


After finishing a project I can't start the next one without reorganizing things around me. And above all in my head. Almost always between two projects one of my favorite method to clear my mind is a short session of quilting. Trying new shapes, new patterns. Looking to match different colors of threads with different colors and patterns of fabrics.

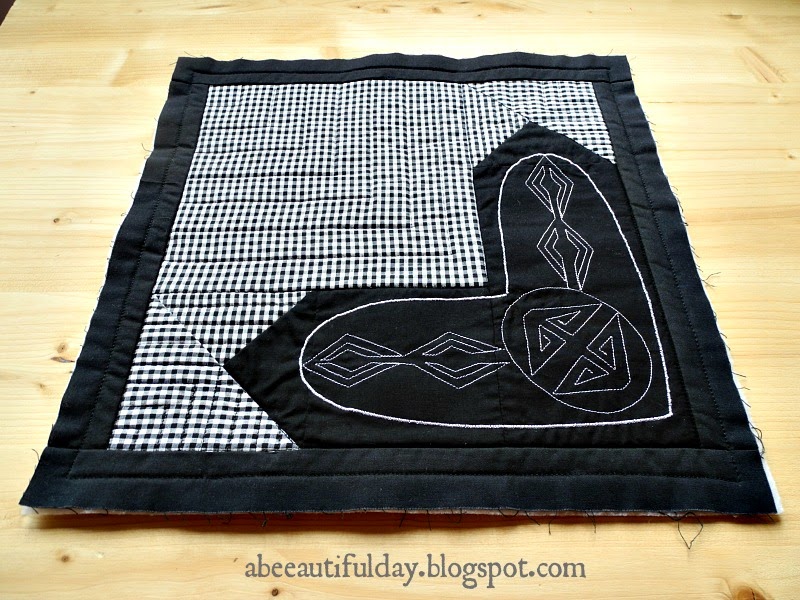
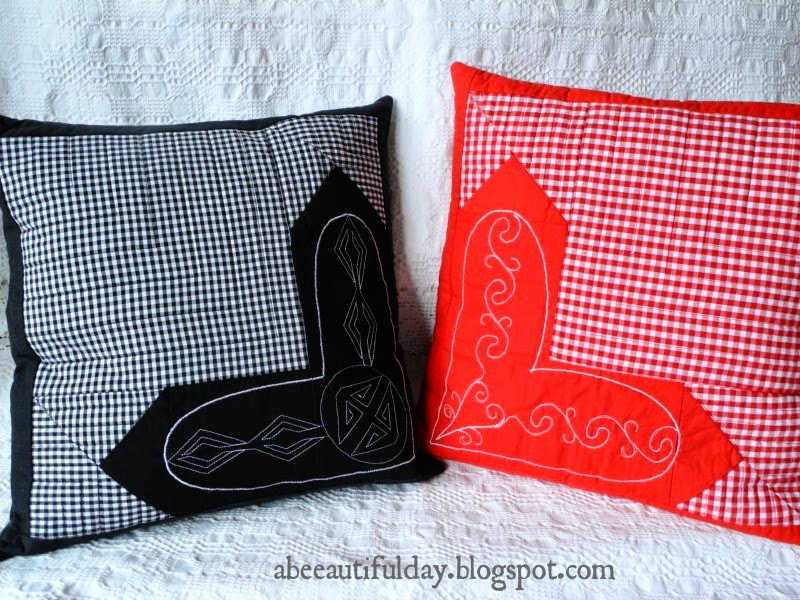
This time my quilting pause has one more finality: I brought together a few scraps of good and cheap fabrics I had on hand and I made two different tops for two 16" x 16" pillow covers for our bed.


I like quilting but I'm not good at it. I don't have patience to stitch over and over again the same design  following strictly the same paths. Above all I can't stitch perfect rounded or geometrical shapes. I'm not the kind of person looking and loving to do this.


I'm attracted by the free hand quilting designs. Even when I stitch repeated circles or spirals, I'm not looking to get the same shape or size. Nor perfectly straight lines, or equal distances between them...


All I want is that my quilting design to compliment the background.
And this is not easy. Not easy at all.


But I keep trying to think the final object I make, even if it is a humble simple one, as a whole composition, regarding both his aspect and usefulness and to treat quilting as one of its elements not an end in itself. And when I don't forget to think like this I find easier the answer at the well known question " How I will quilt this?"


So, let's practice some quilting!

Have a beautiful day, my dears!


Thursday, 29 January 2015

Love Thoughts - Valentine Embroidered Patchwork Pillow - Free Pattern


It's the end of January and I have spent about half of it pondering, drawing and sewing for this Valentine themed project. It came out one Heart Quilt Block and two Embroidery Designs: one for Her and one for Him.


 Trying to suggest rather than explicitly show, I decorated "his" heart with straight lines and "her" heart with curved lines. My favorite source of inspiration - as always, Romanian needlepoint stitches.

An important mention: it is a quick project. It takes just a few hours to sew it, including the embroidered heart.
I equally thought about embroiderers and quilters: I made the two designs applicable both for embroideries and quilting designs. As you will see below, they are forgiving designs.They don't require perfection.

If you want to add a fresh look to your Valentine gifts, give it a try!

Please respect my work - Note that this pattern and designs are for individual use only. Not for resale. If you show them on your blog, site, Pinterest, Flickr..., don't forget to add the link back here, on my blog.


Valentine Embroidered Patchwork Pillow-Tutorial-abeeautifulday.blogspot.com


Finished size: 14" x 14"
All seam allowances are ¼".
Press the seam allowances toward the dark fabric unless otherwise stated.
Read through all instructions before you begin.

Materials requirements

For the pillow front:
-Fabric A (mine is gingham): ¼ yard
-Fabric B (mine is solid): 1/4 yard
-Batting: 15" x 15"
-Cutaway or Tear-away stabilizer: 9" x 9" (for embroidery)

For the pillow back:
-Fabric for 14 1/2" square, buttons or zipper, according to your preferences.

Cutting Instructions

 Fabric A

Cut one piece of each:

Valentine Embroidered Patchwork Pillow-Tutorial-abeeautifulday.blogspot.com


 Fabric B
Cut one piece of each:

Valentine Embroidered Patchwork Pillow-Tutorial-abeeautifulday.blogspot.com


Sewing Instructions

Use illustrations bellow as a layout guide:

Valentine Embroidered Patchwork Pillow-Tutorial-abeeautifulday.blogspot.com


8) Add the border

Valentine Embroidered Patchwork Pillow-Tutorial-abeeautifulday.blogspot.com


9) Print the embroidery design

For each of the two designs follow the same steps:
Right-click on the image. Select "Save as..." and save it on your computer. Print it in the original size. Measure the 1" square to verify if the scale is correct. The drawing fits on a single page. It doesn't matter if the print is a bit smaller or bigger as long the heart outline fits the background heart pieced block.

Valentine Embroidered Patchwork Pillow-Tutorial-abeeautifulday.blogspot.com
"His" Embroidery design
Valentine Embroidered Patchwork Pillow-Tutorial-abeeautifulday.blogspot.com
"Hers" Embroidery design


10) Transfer the design onto the pillow front using a water-soluble pen.

Valentine Embroidered Patchwork Pillow-Tutorial-abeeautifulday.blogspot.com

11) Add the embroidery  - optional step!
To prepare to embroider spray a piece of stabilizer with temporary adhesive on the wrong side of the pillow front and smooth the fabric on top. You don't need a hoop.

For "His" design I used the applique foot that gave me a large field of visibility.
I chose two standard stitches of the sewing machine: satin stitch for the outline and straight stitch for the inside design.

Valentine Embroidered Patchwork Pillow-Tutorial-abeeautifulday.blogspot.com


For "Hers" design I used the applique foot for the outline and the free motion foot for the inside design.

Valentine Embroidered Patchwork Pillow-Tutorial-abeeautifulday.blogspot.com

Once the design is finished trim away the excess stabilizer on the back.

Valentine Embroidered Patchwork Pillow-Tutorial-abeeautifulday.blogspot.com

12) Quilting the pillow front

If you stitched the embroidery - Center the pillow front with its wrong side on the piece of batting. You don't need backing. Quilt the rest of the pillow front as desired.

If you did not embroider  - stitch through both layers quilting first the traced heart pattern. Quilt the rest of the pillow front as desired.

Valentine Embroidered Patchwork Pillow-Tutorial-abeeautifulday.blogspot.com

Wash the pillow front to get rid of pen traces.
While it dries prepare the pillow back.
Join the front and the back together.
Done!

Valentine Embroidered Patchwork Pillow-Tutorial-abeeautifulday.blogspot.com


Valentine Embroidered Patchwork Pillow-Tutorial-abeeautifulday.blogspot.com

Valentine Embroidered Patchwork Pillow-Tutorial-abeeautifulday.blogspot.com

Enjoy my pattern and designs!
I would be very happy to see they are useful.

Short note for my newsletter subscribers
As I promised at the beginning of 2015, I will send you a monthly illustrated calendar to use it by printing or save it on your computer.
In the next newsletter (which you will receive in a few hours) I will send you the February free calendar. I hope it will bring a bit of joy in these grey winter days!

Have a beautiful day, my dears!

I am linking to Finish it up Friday!


Sunday, 12 January 2014

Old things - New things / Lucruri vechi - Lucruri noi


New year is not just about new projects, but for finishing old ones too, said somebody these days.
I'm totally agree. 
I am enjoying this one:


It looked like this


Its story begins here.
Now the setting is totally different. One of my quilting friends encouraged me to change it. 

I decided to do so, even the pattern I made as a Courthouse Steps patchwork block was ready to go out in the Quilting World.
If it is possible to be done better, why not, I said to myself.
And I am writing a new pattern for this block.
I hope it will be attractive for the quilters and I hope too I will finish it soon.
My new fresh kona fabrics are waiting on my table.

Thank you fabrix.ro for your fast delivery! 
One color - one Country Home Block.


To be continued...


Have a beautiful week!


Sunday, 16 June 2013

Improvising/Improvizand

Unele ies, altele, nu.
Si nici alea care ies nu sunt asa cum le-am gandit.


Am constatat ca am nevoie de fete de perna. Si decorative si pentru lenjeria de pat.
Prilej de relaxare activa si de incercari!

Astea sunt pentru V.
Mai am o gramada de facut, pentru ca am dat si rateuri.
Nimic nou: graba strica treaba!

Sa aveti o saptamana frumoasa!

Have a beautiful week!

Friday, 15 February 2013

Changing the colors / Schimband culorile

I had only few fabrics from the natural range beige-brown colors.
Nevertheless I managed to sew two cushions.


Have a beautiful day!

Wednesday, 21 November 2012

Another one! / Inca una!

My second doll is ready.
Ready for Winter Holidays.
Look how bright is the little Star!


Now, what do you think? This new doll is a She or a He?


I'm waiting for your opinion. Really!
I need some help to improve the design of my dolls.
I would appreciate your messages very much!


Thank you from now!
and
Have a beautiful day!

Thursday, 26 April 2012

Speeeed - A late update with red and black

Cam intarziat  update-ul asta, da' n-o sa va suparati pe mine doar din cauza asta, nu-i asa? ;)

Multe lucruri neplacute m-au impiedicat sa va mai arat cate ceva din ce-am mai lucrat. Caci asa, printre tot felul de picaturi, am lucrat! Dar n-am avut starea sufleteasca potrivita sa fac si niste poze mai ca lumea sau si mai si: sa leg idei.
Acum ca incet, incet, lucrurile se mai limpezesc, incerc sa revin. Si m-am gandit sa incep cu ce am terminat (!).

Va mai amintiti de povestea asta?

Eeeei, gata, s-a facut frumos afara, a venit primavara, starea de spirit s-a inviorat  si am avut spor la lucru:


The Racing Start - Fata de perna 50x70 cm
Doar nu credeati ca am pus bucatelele alea in carouri, asa, la intamplare....dar am vrut sa-i pun putin pe ganduri pe cei ce vor privi perna asta. Inclusiv pe posesor. 
Asa ca am facut un mic test: l-am pus pe sotul meu sa-mi spuna ce-i sugereaza imaginea si dupa un mic moment de gandire mi-a spus: Startul unei curse auto.
Mai, mai, si eu care aproape deschisesem gura sa-i zic: Mneeeh! N-ai ghicit!
Mi-am inghitit vorbele, am incuviintat si m-am mirat, totusi: gradul de abstract e destul de mare....oricine poate vedea orice...Pe urma mi-am dat seama: stia ca subiectul principal al amenajarii camerei lui V. va fi "masina si tot ce e legat de masini", asa ca de-aia n-a plutit cu imaginatia in alta parte.... :))

Apoi, m-am hotarat si cum sa bordez quiltul lui V.:
Imi pare rau ca nu am avut cum sa il fotografiez in intregime, din tot felul de motive tehnice...
Si asa, incet, dar sigur, incep sa se lege lucrurile in camera lui.


Mai sunt multe de facut!

Sa aveti o zi frumoasa!
Have a beautiful day!

Monday, 6 February 2012

From Inside to Outside and Inside Again / Dinauntru, afara si iar inauntru

Zilele astea, cand iarna ne arata de ce e ea in stare cand vrea, stau mai mult inauntru si incerc sa leg cateva idei, printre care asta:


E doar un fragment dintr-o viitoare fata de perna. Fused . Partial applique, partial free motion. Trebuie armonizate perfect (!) functionalitatea si ornamentalul. De-aia, desi n-ar fi bine,o sa festonez marginile pieselor aplicate. Fata asta de perna va fi spalata si marginile nu trebuie sa se destrame. Incerc sa gasesc cel mai discret mod de a borda, in asa fel incat cusaturile sa se integreze in compozitie. Intentia  suna bine, dar sa vedem daca reusesc...
Cum de obicei nu prea sunt in stare sa planific in detaliu, pentru ca imi vin ideile mai ales cand lucrul este sub talpita masinii de cusut, si de data asta aplic metoda "as you go".  Pe facute, mai pe romaneste...

Ca sa imi fac putin curaj, arunc o privire pe geam si culeg cateva mostre de compozitii plastice de afara:


...incerc sa adaug si o nota de interior...sa vedem cum da verdele pe combinatia de culori de afara...


...dupa care, o vaga mireasma imi aminteste ca undeva si mai inauntru, in inima casei, cum i se mai spune, se afla una din micile bucurii cu care ii astept pe ai mei:
...o paine calda...

Si asa a aparut o alta compozitie plastica. 


O saptamana frumoasa, sa aveti!
Have a beautiful week!